High winds have a particular way of finding the weak points in a shingle roof. One gust lifts an edge, the next peels back a tab, and suddenly you have a patch of exposed underlayment staring back at the sky. I have climbed onto roofs the morning after a storm and seen missing shingles like teeth knocked out of a smile. Other times, the damage is subtle: a scuffed surface, a slightly raised corner that looks harmless until the next storm drives rain beneath it. The first hour after discovering wind damage sets the tone for everything that follows, from preventing interior leaks to choosing between roof shingle repair and roof shingle replacement. Get that hour right, and you save money, stress, and often your ceiling.
This guide walks through what to do first, what to inspect, and how to decide whether a careful patch will last or a broader fix makes sense. It also covers the practical details that matter when working with a shingle roofing contractor: timing, documentation, materials, and the trade-offs that rarely show up in glossy brochures.
Safety and Triage Before Any Repair
Even seasoned roofers treat a wind-damaged roof with caution. Shingles can be loose underfoot, nails may be raised, and gusts arrive without warning. If you must go up, wait for calm weather, wear soft-soled boots, and use a properly footed ladder that extends at least three feet above the eave. If the roof is steep, slick, or still windy, stay off it. Binoculars from the ground and photos from a windowed dormer or a drone can tell you most of what you need to know for the first decisions.
The goal in the first 12 to 24 hours is to stop water and document what happened. Small gaps often lead to big stains. I have seen a single tab missing near a roof’s edge send water down inside the wall cavity, appearing days later as a blistered patch of paint. Water always finds a path. Your job is to close paths fast.
A First-Pass Assessment You Can Do From the Ground
Start by walking the property’s perimeter. Look for shingles in the yard or against the fence, especially near downspouts and shrubs where pieces collect. Note which slope faces the direction the wind came from. Wind lifts on the leeward edges and the ridge, so damage often concentrates on the side that took the full brunt and along the top.
Scan the roof visually. Missing shingles are obvious. More subtle clues include lifted tabs that cast thin shadows, lighter-colored spots where the granules have scraped off, and lines of distorted shingles that look wrinkled or cupped. Pay attention to areas around roof penetrations, such as vent stacks and skylights, and around valleys. The factory seal strip under shingles can break without the piece blowing off. If the shingle lies flat but moves in the breeze, the bond is gone.
Check gutters and the base of downspouts for granules. A normal roof sheds some granules, but a post-storm surge looks like a strip of coarse sand. Heavy granule loss after wind means the shingles took abrasion, often from flapping. That kind of wear shortens shingle life even if nothing is missing today.
Inside, check ceilings on the top floor, especially below problem slopes. Look into the attic if it is accessible and safe to enter. A flashlight will reveal wet decking, shiny nail tips, or damp insulation. If you smell that raw lumber scent or see darkened seams on the roof sheathing, water is getting in.
Temporary Measures That Actually Work
When a shingle is missing and rain is in the forecast, a practical temporary fix is worth more than any grand plan. Plastic or fabric tarps do work, but they fail when stapled or taped in place. Wind turns a flapping edge into a sail. If you do use a tarp, run it from the ridge down past the damaged area and secure it over a furring strip screwed into the rafters near the ridge. Do not pepper the field with nails. Every hole is another leak later. In many cases, peel-and-stick roofing membrane strips, also called ice and water shield, offer a better temporary seal. Applied to a clean, dry surface and overlapped correctly, they adhere tenaciously and bridge small gaps until a permanent shingle roof repair can happen.
For lifted tabs that still exist, a spot of roofing cement under the corner sets them down. Press firmly and sprinkle a pinch of loose granules from the gutter on the exposed cement to protect it from UV. This only helps if the shingle is otherwise intact and the nail lines have not torn.
If the wind took the ridge cap, cover that ridge quickly. A ridge is a zipper. Once it starts to open, rain and wind chase each other down the peak. A strip of ice and water shield centered on the ridge, followed by a properly secured tarp if necessary, buys time.
What Wind Does to Shingles, and Why That Matters
Understanding how wind damages a shingle roof helps you choose the right repair strategy. Modern asphalt shingles rely on a combination of physical fastening and adhesive bonding. Nails secure the shingle through specified nail lines. Heat and sun activate a tar-like seal strip that bonds the overlaying shingle to the one below. Wind pressure varies across a roof, creating uplift forces. Once a tab lifts, it pries at the nails. Repeated lifting flexes the mat, breaks the seal, scours granules, and can crack the shingle around the nail heads.
A shingle that simply lost its seal, but has not torn or creased, might be re-sealed with a dab of asphalt cement in moderate climates. A shingle with a visible crease line, however faint, has lost structural integrity. A creased shingle often splits later under heat and movement. Re-sealing it is a short-term patch at best.
Age matters too. On a newer shingle roof, the seal strip is more likely to re-bond, and the mat is more flexible. On a 15-year-old roof, especially one baked by southern sun, the mat becomes brittle. In that case, a wind event that lifts tabs may be the moment you start pricing roof shingle replacement.
The Repair Decision: Spot-Fix, Partial Replacement, or Full Replacement
No one wants to replace a roof prematurely, but I have seen homeowners spend good money on piecemeal repairs for two or three storm seasons only to capitulate later, frustrated and light in the wallet. The decision pivots on three questions: the extent of damage, the roof’s age and condition, and your risk tolerance for future storms.
A spot-fix works when damage is confined to a handful of shingles and the surrounding field looks healthy. A competent technician can slip replacement shingles into place, align the nail lines, seal the edges, and match the color closely if you have spare bundles from the original roof shingle installation. Without spares, even a good match may age differently. A small color variation on a back slope matters less than a patch near the front entry.
Partial replacement makes sense when an entire slope shows lifted seals, creases, or missing pieces, but the opposite slopes still look sound. The windward side of a two-story colonial, for example, often suffers more while the leeward slopes stay intact. Replacing an entire slope avoids a quilt of patches and gives you a clean starting point for that exposure. It also simplifies the shingle roofing contractor’s work, which can keep labor costs reasonable per square.
Full roof shingle replacement becomes the rational choice when the roof is late in its service life, the damage is widespread across multiple slopes, or the underlayment and decking show signs of water intrusion. A large storm that strips a ridge, opens valleys, and scatters shingles across the yard is often the moment to accept that the system has reached its limit. The upside of full replacement is a uniform warranty, updated underlayment, and the chance to correct ventilation and flashing details from the previous build.
What Quality Repair Looks Like Up Close
Good shingle roof repair follows the same discipline as original installation, just on a smaller canvas. The technician loosens the adhesive bond on the course above, gently raises it with a flat bar, and removes the nails securing the damaged shingle. A replacement shingle is cut to match if only a tab is missing. Nails go in the proper line, never high, never low. Each nail is driven flush, not sunk below the surface. The technician seals the shingle with manufacturer-approved asphalt cement, enough to bond without oozing. On older roofs where the surrounding shingles have lost flexibility, care matters twice as much. Aggressive prying cracks brittle material, and then a three-shingle fix becomes a seven-shingle ripple.
Valleys and rakes (the sloped edges) deserve special attention. If wind damage shows near a valley, confirm that the metal valley flashing remains intact and that nails are set the correct distance from the valley centerline. Wind-driven rain exploits nails too close to valleys. At the rake edge, check the starter course adhesion and whether the drip edge is sound. I have chased leaks that only appeared in crosswinds because the starter strip never bonded properly at the edge.
Matching Shingles: The Aesthetic Challenge
Color matching is harder than most people expect. Asphalt shingles fade at different rates based on sun exposure and batch variations. Even the same product line can shift slightly from year to year. If your original roof shingle installation left spare bundles, they are gold. Keep them dry and flat, stored in a temperate area. If you have no spares, your shingle roofing contractor can order the closest match or source from supply houses with older stock. Place repairs where they are least conspicuous when possible. On front-facing slopes, replace a few extra shingles beyond the damaged area to blend the transition. Color differences often mellow over a few seasons as the new shingles weather, but glaring mismatches rarely vanish entirely.
When Wind Exposes Bigger Problems
A storm puts your roof under a stress test that reveals hidden flaws. I have opened a lifted shingle to find nails driven too high above the nail line. High nailing weakens wind resistance because the shingle below misses part of the intended fastening zone. Sometimes the ridge vent was installed with nails too short to bite into the decking, so a big gust loosened it bit by bit. Other times, the underlayment laps were reversed at a dormer cheek, so wind-blown rain entered under the shingles even though they looked fine from the outside.
If you see consistent patterns, like rows of tabs lifting across an entire slope, suspect a systemic installation issue rather than a random event. That may tip your decision toward partial or full replacement and toward a different shingle roofing contractor for the next job. Ask for photos during repairs. Good contractors document what they find, not just the final patch, and will explain how they fixed it.
Insurance Realities After Wind Damage
Wind damage often falls under homeowners insurance, but the path to a check is not automatic. Insurers distinguish between sudden, accidental damage and wear. Missing shingles after a named storm fit the first category. A roof with widespread granule loss and brittle mats from age lands in the second. Expect an adjuster to look for both.
Document while the scene is fresh. Date-stamped photos of the roof, the yard, and any interior leaks help. Save pieces of torn shingles if you have them. A written note with wind speeds from a credible local source, such as the National Weather Service, can support the claim. If you bring in a shingle roofing contractor for a repair estimate, ask them to detail quantities, locations, and the specific failure they see. Adjusters like specifics, for example, “12 damaged shingles on the south slope near the ridge with visible creasing and broken seals, plus one missing ridge cap over the master bedroom.”
Be aware of the deductible and the policy’s actual cash value versus replacement cost terms. For an older roof, some policies pay only the depreciated value of the damaged area unless you complete a full replacement. If you plan to proceed in stages, clarify how that affects coverage.
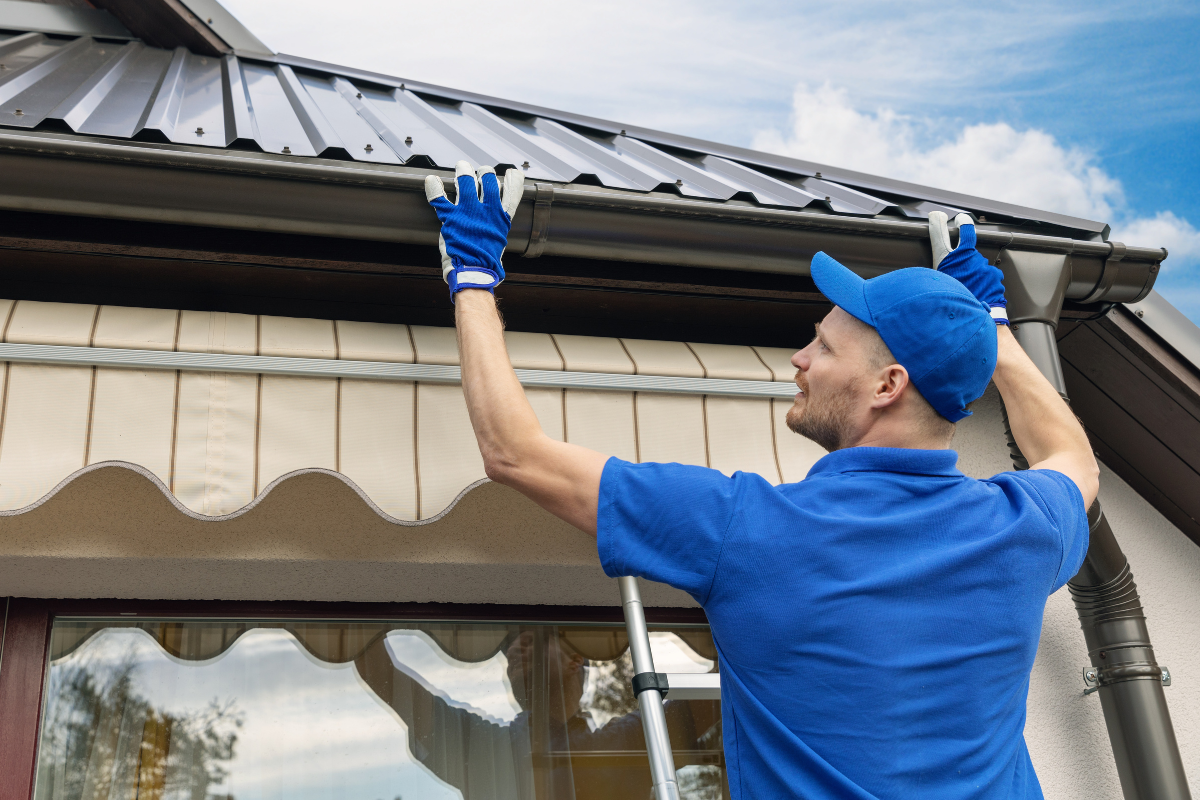
Choosing the Right Shingle Roofing Contractor for Repairs
Not every contractor handles small repairs with care. Some chase full replacements and treat repairs as an afterthought. Look for someone who does both and can explain why a repair is sufficient or why it is not, without a sales pitch. Ask direct questions: What is your plan to lift surrounding shingles without breaking them? Will you match the nail pattern and sealant? How will you protect the roof if rain arrives mid-job? An experienced crew answers without flinching and usually carries a small kit for emergency dry-in, including membrane, cement, and tarps.
Scheduling matters after a storm. Good contractors triage too, addressing active leaks first, then high-risk exposures, then cosmetic and minor fixes. If you are not leaking, you might wait a day. In exchange, you should expect a clean, careful repair when your turn comes, not a rushed job tossed together at dusk.
Material Quality and Wind Ratings
Not all shingles handle wind the same way. Asphalt shingles carry wind ratings certified by ASTM standards and manufacturer testing. Many architectural shingles rate for winds up to 110 to 130 mph when installed to spec, with options to upgrade fastener counts or use specific starter strips for higher ratings. That rating assumes proper nailing, correct starter and hip and ridge components, and a full bond on the seal strip. If you live on a ridge or near a wide open field where winds run unobstructed, it may be worth upgrading materials during a roof shingle replacement. Small details, like using a six-nail pattern instead of four, or applying a manufacturer-approved starter strip that aligns with the sealant, add real resistance. I have seen the difference in neighborhoods where one roof holds its line while the next loses tabs in the same gusts.
The Real Costs: Repair vs Replacement
Costs vary by region, pitch, and access, but some general ranges help frame the decision. A straightforward shingle replacement for a handful of tabs may run a few hundred dollars if access is easy and materials match. Repairs that involve ridge caps, valleys, or steep slopes climb into the mid hundreds to low thousands. Partial slope replacements land in the multiple-thousand range depending on square footage and complexity. Full roof shingle replacement costs scale by size, typically priced per square, with additional charges for tear-off, disposal, deck repairs, and upgraded underlayment or ventilation.
The least expensive option today is not always the cheapest over five years. If a roof is at year 18 of a 25-year shingle, and a storm strips a ridge and creases a dozen tabs across three slopes, you may spend heavily on repeated service calls and still face replacement soon. Conversely, a three-year-old roof that lost two shingles near a vent should be carefully repaired, documented, and left to live out its expected life.
A Practical Sequence the Day After the Storm
- Photograph everything you can safely see, including the yard, gutters, and any interior staining. Note the date, time, and wind conditions. Stop active leaks with temporary measures: membrane strips, a well-secured tarp that sheds water, or cement under lifted tabs. Call a reputable shingle roofing contractor who performs repairs and replacements, and describe what you observed, not what you assume. If insurance likely applies, notify your carrier and keep receipts for temporary protection, which policies often reimburse. Set expectations on timing with the contractor, and ask for documentation of the repair for your records and the insurer.
Common Mistakes That Create Second-Order Damage
Rushing onto a wet roof ranks at the top. The second is over-nailing a tarp or slathering roofing cement everywhere. Cement is a tool, not a cure-all. Excess cement traps heat, sheds granules, and makes later repairs messier. Another common misstep is ignoring attic evidence. A roof can look fine from outside while water travels under the shingles due to broken seals or high nailing. Moisture in the attic, if left alone, breeds mold and rusts fasteners in a season.
DIYers often underestimate how brittle older shingles become. On a 12-year-old slope in full sun, simply lifting a shingle to access a nail can crack it. If you are determined to try a small repair yourself, practice on a shingle hidden under a ridge cap or a section that will be replaced anyway. You will quickly feel how much force the material tolerates. If it crumbles in your hand, step back and call a pro.
What To Expect During a Professional Repair Visit
A good repair visit starts with a short walk-through. The technician will look at the damage, check the attic if you have one, and scan the roof for related issues. They will set ladders carefully to avoid denting gutters and will likely carry a kit with replacement shingles, nails, a flat bar, a hook blade, cement, starter strips, and a small roll of membrane.
The work area gets cleaned of granules and debris so cement bonds well. Nails are removed methodically, not yanked, to avoid lifting surrounding shingles. Replacement pieces are cut to fit precisely, with the factory edge placed where it aligns best with the existing course. If color matching is imperfect, the tech will often feather the repair outward by replacing a few additional shingles to make the transition subtler. On ridge caps, the direction of overlap matters: always away from prevailing winds. Once the repair is complete, the crew polices the yard for nails with a magnetic roller and snaps a few photos for the file.
Preventive Measures That Pay Off
If wind events are becoming more frequent where you live, a few upgrades and habits reduce future damage. During any repair or partial replacement, ask about switching to a six-nail pattern and a starter strip designed to pair with your shingles’ sealant line. Verify the drip edge is intact and overlaps the underlayment correctly. On ridges, use a compatible ridge cap with the correct fasteners that penetrate the decking firmly. Check attic ventilation. Excess heat cooks shingles from below and weakens the seal strip over time, making wind damage more likely. Trees that overhang the roof do not just drop leaves; branches whip in wind and scuff granules. Trim them back to reduce abrasion.
Keep a small storm kit. A roll of ice and water shield, a handful of furring strips, long exterior screws, a tube of roofing cement, and a blue tarp live quietly in a garage corner until you need them. I have handed versions of that kit to more homeowners than I can count. Every one of them was glad to have it when the next front rolled through.
Edge Cases Worth Calling Out
Manufactured homes and sheds with low-slope roofs experience wind differently. Shingles have minimum slope requirements. On borderline low pitches, wind-driven rain runs uphill under shingles more easily. If you https://maps.google.com/maps?ll=25.994871,-80.166664&z=16&t=m&hl=en&gl=US&mapclient=embed&cid=2326794835190123314 see repeated issues on a low-slope section, consider switching that area to a membrane system during the next project. On coastal properties, salt air accelerates fastener corrosion. Upgrading to stainless or coated fasteners and verifying fastener length and penetration become more critical.
Solar arrays complicate repairs. Wind can scour shingles around mounting feet where water paths concentrate. If you plan a roof shingle replacement on a roof with solar panels, coordinate de- and re-installation well ahead. I have seen projects delayed for weeks waiting for the solar company, while a temporary tarp had to hold through two storms.
Historic districts bring aesthetic rules. You may be required to match the original profile or even switch to a specific shingle type. Build that into your timeline and budget.
When a Repair Becomes Part of a Bigger Plan
A thoughtful homeowner treats each repair as a data point. If the same slope keeps needing attention after each storm, the pattern suggests a vulnerability. Maybe the house sits in a wind corridor between two taller structures, or the roof’s geometry funnels gusts at a particular valley. The next time you plan a roof shingle replacement, share that history with your contractor. They can adjust fastening patterns, choose shingles with higher wind ratings, tweak ridge vent designs, or add secondary water barriers in strategic spots. Roofs are systems. Improving one detail without considering the rest leaves money on the table.
Final Thoughts From a Ladder
Wind does not negotiate. It finds loose edges and tests what you cannot see from the driveway. Your response should be calm, practical, and quick where it counts. Protect against water first, then document, then bring in a skilled shingle roofing contractor who respects both repair and replacement as legitimate answers. A careful roof shingle repair on a healthy roof can last the rest of the shingle’s life. A tired roof with widespread wind scars deserves a proper reset. Either way, you control the outcome by acting early, asking good questions, and insisting on workmanship that follows the small rules, because on a shingle roof, small rules are what keep the big weather out.
Express Roofing Supply
Address: 1790 SW 30th Ave, Hallandale Beach, FL 33009
Phone: (954) 477-7703
Website: https://www.expressroofsupply.com/
FAQ About Roof Repair
How much should it cost to repair a roof? Minor repairs (sealant, a few shingles, small flashing fixes) typically run $150–$600, moderate repairs (leaks, larger flashing/vent issues) are often $400–$1,500, and extensive repairs (structural or widespread damage) can be $1,500–$5,000+; actual pricing varies by material, roof pitch, access, and local labor rates.
How much does it roughly cost to fix a roof? As a rough rule of thumb, plan around $3–$12 per square foot for common repairs, with asphalt generally at the lower end and tile/metal at the higher end; expect trip minimums and emergency fees to increase the total.
What is the most common roof repair? Replacing damaged or missing shingles/tiles and fixing flashing around chimneys, skylights, and vents are the most common repairs, since these areas are frequent sources of leaks.
Can you repair a roof without replacing it? Yes—if the damage is localized and the underlying decking and structure are sound, targeted repairs (patching, flashing replacement, shingle swaps) can restore performance without a full replacement.
Can you repair just a section of a roof? Yes—partial repairs or “sectional” reroofs are common for isolated damage; ensure materials match (age, color, profile) and that transitions are properly flashed to avoid future leaks.
Can a handyman do roof repairs? A handyman can handle small, simple fixes, but for leak diagnosis, flashing work, structural issues, or warranty-covered roofs, it’s safer to hire a licensed roofing contractor for proper materials, safety, and documentation.
Does homeowners insurance cover roof repair? Usually only for sudden, accidental damage (e.g., wind, hail, falling tree limbs) and not for wear-and-tear or neglect; coverage specifics, deductibles, and documentation requirements vary by policy—check your insurer before starting work.
What is the best time of year for roof repair? Dry, mild weather is ideal—often late spring through early fall; in warmer climates, schedule repairs for the dry season and avoid periods with heavy rain, high winds, or freezing temperatures for best adhesion and safety.